5 Easy Hairstyles for Busy Mornings
In the hustle and bustle of our daily lives, it’s not always easy to find the time for an elaborate hairstyling routine. The rush to get ready, meet deadlines, and navigate through various responsibilities can leave us feeling overwhelmed. Amidst this chaos, the significance of a well-groomed appearance, particularly a perfect hairstyle, should not be underestimated.
However, that doesn’t mean you have to compromise on looking chic and put-together. With these 5 easy hairstyles, you can effortlessly elevate your look, even on the busiest of mornings. Join us as we discover the art of quick hairstyles, uncovering tips, tricks, and inspirations to navigate the morning rush with efficiency and flair. Let’s dive into the world of hassle-free hairdos that will leave you looking fabulous in no time.
The Power of a Perfect Hairstyle on Your Day:
Consider your hairstyle as more than just a collection of strands; it is a statement, a reflection of your personality, and a boost to your self-esteem. A carefully chosen and well-executed hairstyle can be a source of empowerment, setting the stage for a day filled with confidence and success.
Research suggests that personal grooming, including hairstyling, has a direct impact on one’s psychological well-being. The act of investing time and effort into one’s appearance can contribute to a positive self-image, leading to increased confidence and a more optimistic mindset.
The significance of quick hairstyles lies in their ability to be both a time-saver and a confidence booster. They bridge the gap between the practical demands of a hectic morning and the desire for a stylish presentation.
The Classic Messy Bun:
The classic messy bun is a popular and versatile hairstyle that exudes a relaxed and effortless charm. It’s characterised by a loose and undone look, giving off a casual yet chic vibe. The appeal of the messy bun lies in its simplicity, adaptability, and the ability to achieve a stylish look without spending much time on intricate styling.
A. Quick Steps for a Messy Bun
Preparation:
- Start with dry hair. If your hair is too clean or slippery, it might be harder to style. Brush your hair to remove any tangles.
Gather Your Hair:
- Flip your head forward and gather your hair into a high ponytail using a hair tie. The position of the ponytail will determine the placement of your bun.
Twist and Wrap:
- Twist the ponytail and start wrapping it around the base to form a bun. Keep it loose for that effortlessly messy look.
Secure the Bun:
- Use another hair tie, bobby pins, or a claw clip to secure the bun in place. Allow some strands to fall out naturally to enhance the messy appearance.
Adjust and Pull:
- Gently pull on some sections of the bun to loosen it and create a more voluminous, relaxed look.
Flyaways:
- Embrace flyaways for that intentionally messy finish. You can use a bit of hairspray or texturizing spray to hold the style while maintaining a carefree appearance.
B. Customization Tips
Accessorize:
- Add accessories like scrunchies, headbands, or hairpins to personalize your messy bun and elevate the overall look.
Texture:
- Create texture in your hair before styling by using a texturizing spray, sea salt spray, or dry shampoo. This adds grip and enhances the messy aesthetic.
Side or Low Messy Bun:
- Experiment with the placement of your messy bun. Try a low bun at the nape of your neck or a side bun for a different twist.
Braid or Twist Elements:
- Integrate braids or twists into your messy bun for added detail and interest. This can be a small braid wrapped around the bun or a twisted section leading into the bun.
Hair Pieces:
- Consider using hairpieces or extensions to add volume and length to your messy bun for a more dramatic effect.
Messy Bun for Different Occasions:
- Adjust the level of messiness based on the occasion. A slightly neater version might be suitable for a semi-formal setting, while a more tousled look is perfect for a casual day out.
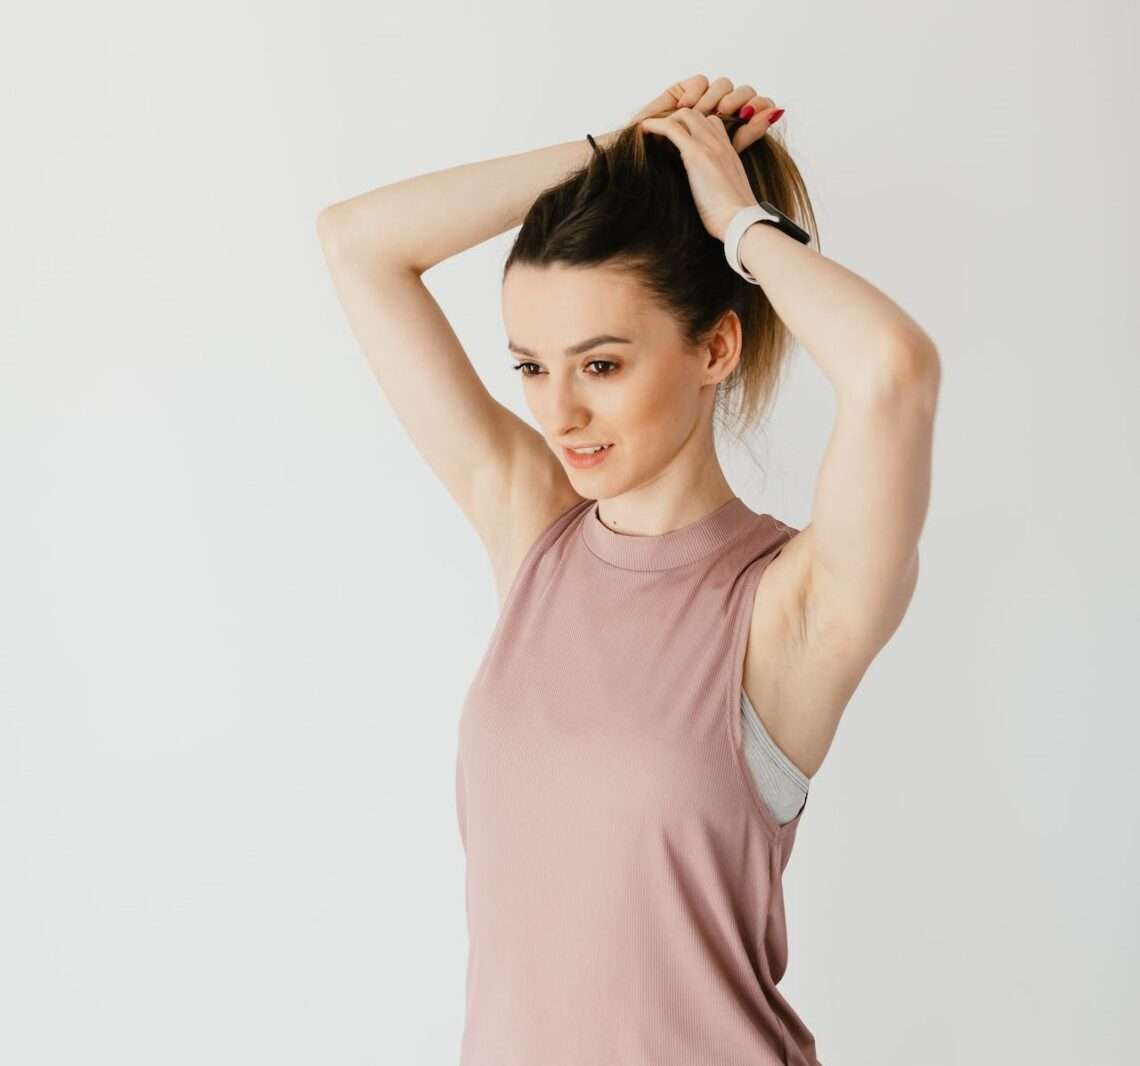
Remember, the beauty of the messy bun lies in its imperfection, so don’t be afraid to experiment and find the version that suits your personal style.
Ponytail with a Twist:
The ponytail with a twist is a stylish variation of the classic ponytail, adding a creative and chic element to a simple hairstyle. This elevated version is perfect for occasions where you want a polished look without sacrificing the ease and simplicity of a ponytail.
A. Steps for Adding a Stylish Twist
Preparation:
- Start with clean, dry hair. Brush out any tangles and knots.
Create a High Ponytail:
- Decide on the placement of your ponytail, whether it’s a high ponytail, mid-height, or low. For an elevated and sophisticated look, opt for a high ponytail.
Secure with a Hair Tie:
- Use a hair tie to secure your hair in a ponytail at the desired height. Make sure it’s tight enough to hold the ponytail in place.
Divide the Ponytail:
- Take a small section of hair from the ponytail and set it aside. This section will be used later to conceal the hair tie.
Twist the Remaining Hair:
- Divide the main part of the ponytail into two equal sections. Twist each section in the same direction.
Twist Together:
- Now, twist the two sections together in the opposite direction. This creates a twisted effect that adds a stylish touch to the ponytail.
Secure the End:
- Use another hair tie to secure the end of the twisted ponytail. This helps maintain the twist and adds a finishing touch.
B. Concealing the Hair Tie Creatively
Wrap the Concealing Section:
- Take the small section of hair you set aside earlier and wrap it around the base of the ponytail to conceal the hair tie. This adds a polished look and hides the elastic.
Secure with a Bobby Pin:
- Use a bobby pin that matches your hair color to secure the wrapped section in place. Insert the pin discreetly to keep the twist looking seamless.
Loosen for Volume:
- Gently pull on the twisted sections of the ponytail to loosen and add volume. This creates a softer and more relaxed appearance.
Accessorize (Optional):
- Consider adding accessories like hairpins, barrettes, or ribbons to enhance the style and make your ponytail with a twist even more unique.
The ponytail with a twist is a versatile hairstyle that can be dressed up or down, making it suitable for various occasions. Experiment with the placement, tightness, and twists to find the variation that best complements your personal style.
Half-Up, Half-Down Knot:
The half-up, half-down knot is a stylish and versatile hairstyle that strikes a balance between the elegance of an updo and the free-spirited nature of loose hair. This hairstyle is perfect for those who want a polished look while keeping a relaxed and effortless vibe.
A. Step-by-Step Guide for the Knot
Preparation:
- Begin with clean, dry hair. You can add some texture with a curling iron or leave it straight, depending on your preference.
Part Your Hair:
- Decide on the parting of your hair. This style works well with a middle part or a side part, depending on your face shape and personal style.
Section for the Knot:
- Take a section of hair from the crown of your head. The size of the section will depend on how large you want the knot to be.
Tie a Knot:
- Tie the section of hair into a simple knot. Pull it tight enough to create a secure knot, but not too tight to allow for a relaxed appearance.
Secure with Pins:
- Use bobby pins or hairpins to secure the knot in place. Cross the pins over each other for added stability.
Leave the Rest Down:
- Allow the rest of your hair to flow down naturally, creating a half-up, half-down effect. You can leave your hair straight, wavy, or curly, depending on your desired look.
Texture and Volume (Optional):
- Use texturizing spray or volumizing products to add texture and volume to the loose hair for a more dynamic appearance.
B. Adapting the Style for Different Occasions
Casual Day Out:
- Keep the knot and the remaining hair loose for a relaxed and casual look. This is perfect for everyday activities or a casual day out with friends.
Formal Events:
- Make the knot more structured and polished for formal occasions. You can use a larger section of hair for the knot and add some shine spray for a more elegant finish.
Bohemian Vibes:
- Create a more bohemian look by leaving some strands of hair loose around your face and incorporating braids or twists into the style.
Accessories:
- Enhance the style with accessories like headbands, clips, or ribbons. Choose accessories that complement the occasion and your outfit.
Experiment with Placement:
- Play with the placement of the knot. Try it higher up on the crown for a more voluminous look or lower for a subtler appearance.
The half-up, half-down knot provides a perfect blend of sophistication and ease, making it adaptable for various occasions. Customise the style based on your preferences and the specific event you’re attending.
Quick French Twist:
The quick French twist is a go-to hairstyle for those moments when you want to achieve an elegant and polished look in a hurry. Despite its chic appearance, the French twist can be achieved with a few simple steps, making it an ideal choice when time is of the essence.
A. Simplified Steps for a French Twist
Preparation:
- Start with smooth, dry hair. If your hair is too slippery, you can add some texture by applying a small amount of styling product.
Gather Your Hair:
- Gather your hair at the nape of your neck as if you were creating a low ponytail. Hold it with one hand, keeping your thumb on top.
Twist Inward:
- Use your free hand to twist the gathered hair inwards towards the nape of your neck. As you twist, guide the hair upward to form a vertical twist.
Tuck and Roll:
- Tuck the twisted hair under itself, creating a roll or tube-like shape. Continue rolling upward until you reach the back of your head.
Secure with Pins:
- Use bobby pins to secure the French twist in place. Insert the pins horizontally, anchoring the twist to the hair underneath. Place a few pins along the twist to ensure it stays secure.
Adjust and Loosen (Optional):
- If you want a softer look, gently pull on some sections of the twist to loosen it slightly. This adds a touch of effortless elegance.
B. Tips for a Polished Finish
Smooth Flyaways:
- Use a small amount of hairspray or a smoothing product to tame any flyaways and keep the style looking polished.
Secure with Quality Pins:
- Invest in good-quality bobby pins that match your hair colour. This helps them blend seamlessly and provides a more polished finish.
Tease for Volume (Optional):
- If you want more volume in the twist, tease the hair slightly before twisting. This can be done by backcombing the hair with a comb or brush.
Accessorize (Optional):
- Add a decorative hairpin or comb to enhance the elegance of the French twist. This is especially effective for formal occasions.
Practice and Perfect:
- The key to a quick French twist is practice. The more you practice, the more efficiently you’ll be able to create a polished look in a short amount of time.
The quick French twist is a timeless hairstyle that adds an element of sophistication to your overall appearance. With a bit of practice, you can master this style and rely on it for those moments when you need a touch of elegance in a hurry.
Braided Headband Bliss:
Braided headbands are a charming and versatile hairstyle that effortlessly adds a touch of bohemian elegance to your look. Whether you’re looking to keep your hair away from your face or simply want to enhance your style with a decorative element, braided headbands offer a delightful solution.
A. Quick Braiding Techniques
Simple Three-Strand Braid:
- Take a small section of hair near your ear, divide it into three equal parts, and weave them together in a basic three-strand braid. Repeat on the other side.
- Pull the braids across the top of your head and secure them behind your opposite ear with bobby pins.
Fishtail Braid Headband:
- Divide your hair into two sections. Take a small piece from the outer edge of one section and cross it over to the other side.
- Repeat this process, alternating sides, until you reach the end of your hair. Secure the end with a small hair tie.
- Position the fishtail braid across your head like a headband and secure it with bobby pins.
Crown Braid Headband:
- Part your hair down the center, creating two sections.
- Starting from one side, braid a small section along your hairline towards the back of your head.
- Repeat on the other side, and secure the ends of the braids together at the back using bobby pins.
Twisted Rope Headband:
- Divide your hair into two sections and twist each section in the same direction.
- Cross the twisted sections over each other in the opposite direction, creating a twisted rope effect.
- Position the twisted rope across your head and secure it with bobby pins.
B. Experimenting with Braid Thickness
Thin and Dainty:
- Create a delicate and subtle look by making thin braided headbands. This works well for adding a touch of detail without being too prominent.
Medium Thickness:
- Opt for a medium thickness for a classic and versatile braided headband. This is suitable for various occasions and complements different hairstyles.
Chunky and Bold:
- Make a statement with a thick and bold braided headband. This adds a more pronounced bohemian touch to your overall look.
Mix and Match:
- Experiment with different thicknesses on different sections of your head, or create a layered effect by stacking braids of varying thicknesses.
Incorporate Accessories:
- Enhance your braided headband by adding small hair accessories like beads, clips, or flowers. This adds a personalised and decorative element to the style.
Loosen for a Relaxed Look:
- After securing the braided headband, gently pull on the edges of the braid to loosen it slightly. This creates a softer and more relaxed appearance.
Braided headbands offer a delightful way to showcase your creativity while keeping your hair stylishly in place. Experiment with different braiding techniques and thicknesses to find the braided headband style that best suits your personality and the occasion.
Accessorizing for Added Flair:
Hair accessories have the incredible power to elevate your overall look and add a touch of flair to your hairstyle. Whether it’s a simple clip, an elegant headband, or a vibrant scarf, the right accessory can add flair and personality to your overall look.
A. Choosing the Right Accessories
- Consider Your Style: Choose accessories that align with your personal style. If you prefer a minimalist look, opt for subtle clips or headbands. For a bolder style, experiment with statement pieces.
- Occasion Matters: Match your accessories to the occasion. Delicate accessories may be suitable for a professional setting, while more elaborate ones can enhance a festive or casual look.
- Outfit Coordination: Ensure your accessories complement your outfit in terms of colour, texture, and overall aesthetic. A well-coordinated look creates a harmonious and polished appearance.
B. Scarves, Clips, and Headbands
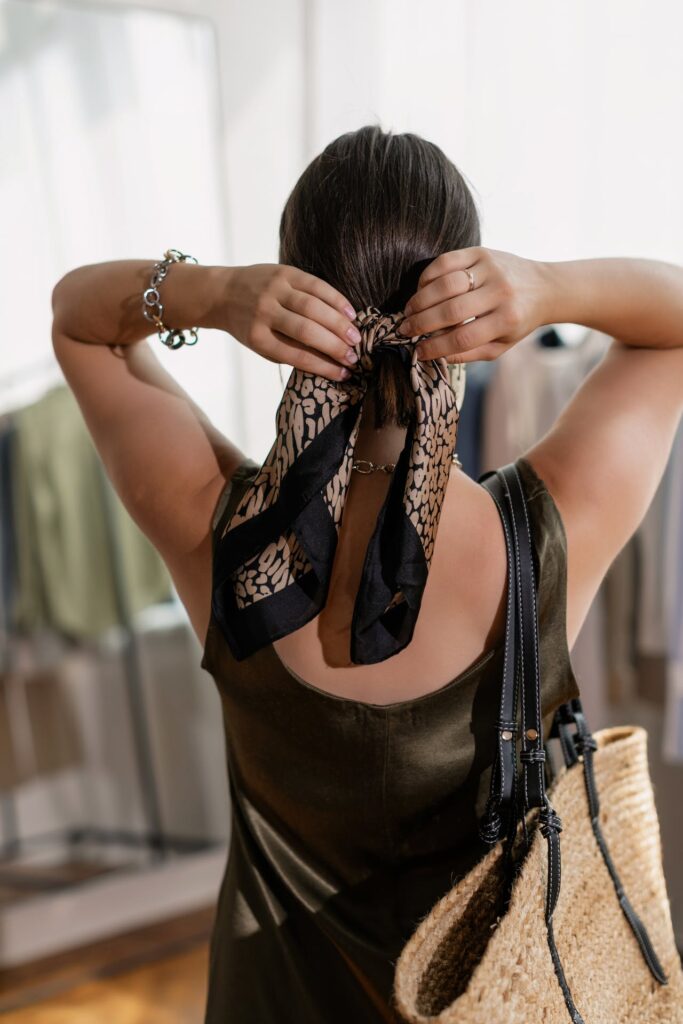
- Quick Twist with a Scarf: Tie a silk scarf around a low ponytail or use it as a headband for an instant chic look.
- Clip and Go: Secure a loose bun or half-up hairstyle with stylish hair clips. They add an element of elegance without requiring intricate styling.
- Headbands for Instant Charm: Slide on a headband for a quick and charming hairstyle. It instantly pulls your hair back and adds a touch of sophistication.
Efficiency without Sacrificing Style:
A. Balancing Efficiency with Aesthetic Appeal:
- Effortless Bun with a Clip: Create a quick low bun and secure it with a decorative clip for an effortlessly chic style that strikes a balance between speed and aesthetics.
- Rapid Headband Tuck: Slide on a headband and tuck the hair behind it for a sleek and time-efficient hairstyle that exudes sophistication.
B. Quick Hairstyles for an Instant Confidence Boost:
- High Ponytail Power: A high ponytail is not only quick but also exudes confidence. Add a scrunchie or ribbon for an extra style boost.
- Effortless Waves: Use a texturizing spray on damp hair, twist it into loose buns, blow-dry, and release for quick, natural-looking waves. Finish with a decorative clip.
Considering Hair Length and Texture:
Versatility Across Different Hair Types:
- Short Hair Styling Hack: Use a headband to create a faux crown braid effect on short hair. Simply tuck the hair into the band for a quick and stylish look.
- Long Hair, Easy Glam: Long hair allows for various styling options. Experiment with loose waves and adorn them with a statement hairpin for a glamorous yet time-efficient style.
Tailoring Styles to Different Lengths:
- Short Hair Accessories: Embrace cute and small hair accessories like tiny clips or decorative bobby pins to add a touch of flair to short hairstyles.
- Long Hair Elegance: For longer hair, try a simple half-up, half-down style with an embellished clip for a quick and elegant look.
C. Highlighting and Embracing Natural Textures:
- Curly Hair Delight: Enhance your natural curls by using a wide headband or scarf as a chic accessory. It keeps the hair out of your face while celebrating your curls.
- Straight Hair Chic: Add a bohemian touch to straight hair by incorporating a braided headband. This simple twist elevates your style without compromising your natural texture.
Incorporating accessories into your quick hairstyles is a practical way to add flair without sacrificing efficiency. Experiment with different accessories and styles to discover what works best for you, allowing you to express your unique personality effortlessly.
Tips for Busy Mornings:
A. Preparing the Night Before:
- Outfit Planning: Select your outfit the night before, ensuring it complements your hairstyle plans.
- Hair Prep: If you’re planning a specific hairstyle, do any necessary prep the night before, such as braiding for waves or setting curls.
- Product Accessibility: Lay out the hair products and accessories you’ll need the next morning for easy access.
B. Must-Have Tools for Quick Styling:
- Quality Hairbrush: Invest in a good hairbrush suitable for your hair type to detangle quickly and efficiently.
- Hair Ties and Clips: Keep a stash of hair ties and clips for securing sections during styling.
- Versatile Hairdryer: If using a hairdryer, opt for one with multiple heat and speed settings for quick yet controlled styling.
C. Effortless Styling Tips:
- Loose Waves: Embrace natural waves by loosely braiding your hair before bed. In the morning, undo the braids and tousle for effortless charm.
- Messy Bun Magic: Perfect the art of the messy bun for a chic and relaxed look that requires minimal styling.
Incorporating Heat-Free Styles:
A. Protecting Hair from Excessive Heat:
- Use Heat Protection: When heat styling is necessary, always use a heat protectant spray to shield your hair from damage.
- Adjust Heat Settings: Lower the heat settings on styling tools to reduce the risk of heat-related damage.
B. Heat-Free Styling Techniques:
- Braids for Waves: Create braids before bedtime for heat-free waves in the morning.
- Sock Bun Curls: Achieve curls without heat by wrapping damp hair around a sock bun before sleeping.
C. Benefits of Heat-Free Styling:
- Reduced Breakage: Heat-free styles minimise the risk of breakage, promoting healthier hair over time.
- Natural Texture Enhancement: Allow your hair’s natural texture to shine without the need for constant heat styling.
Quick Fixes for Second-Day Hair:
A. Refreshing Hairstyles in Minutes:
- Dry Shampoo Saviour: Spritz dry shampoo at the roots to absorb excess oil and add volume.
- Hair Perfume: Refresh your hair’s scent with a light spritz of hair perfume for a quick pick-me-up.
B. Dry Shampoo and Time-Saving Products
- Dry Shampoo Hacks: Use dry shampoo not just for oil absorption but also to add texture for quick styling.
- Leave-In Conditioner: Revitalise dry ends with a leave-in conditioner for a smooth finish without a full wash.
C. Quick Fixes for Curly and Waved Hair:
- Water Mist: Revive curls by misting hair with water and scrunching to redefine shape.
- Curling Wand Touch-Up: Use a small curling wand to touch up individual curls that may have lost definition.
Conclusion:
There’s a unique confidence that comes with the simplicity of quick hairstyles. Knowing that you can transform your look in a matter of minutes is a powerful form of self-assurance. It’s a reminder that beauty doesn’t have to be complicated—it can be as simple and quick as you want it to be. Let these quick and chic styles be a canvas for expressing your natural beauty, a form of self-care, and a source of confidence in the midst of life’s busyness
Whether you’re rushing to work, conquering daily tasks, or simply savouring a quiet moment, let your hair be a reflection of the confident, chic, and beautiful individual that you are. Share your journey on our social media, inspiring others to find joy in simplicity. Remember, a little creativity goes a long way when it comes to hair.


You May Also Like
How to Get Rid of Dark Circles: Effective Tips and Products
31 December 2023
Moisturizer vs Serum: Which is Best For Anti-Aging?
21 November 2023